
Built a BLE-controlled car using ESP32-S3 and Flutter, and honestly the hardware side gave me more trouble than expected. The actual coding part was straightforward, but getting the ESP32 to even accept uploads? That was a journey. Good thing is I documented everything, so you won’t have to go through the same pain I did.
About the Author
I’m Hamza Imran, a freelance mobile app developer specializing in Flutter, ESP32, and Bluetooth Low Energy (BLE) integration. I build cross-platform IoT mobile apps that communicate with embedded hardware - from BLE-controlled vehicles to smart home devices and industrial IoT controllers. If you have an ESP32 or IoT project that needs a mobile app, I’m available for hire.
What You’ll Learn
- Setting up Arduino IDE for ESP32-S3 (the proper way, not the way that times out)
- Writing BLE server code on ESP32
- Motor control basics
- Building a cross-platform Flutter BLE app
- Scanning, connecting, and sending commands over Bluetooth Low Energy
- Troubleshooting common ESP32-S3 issues (there are many)
Who This Tutorial Is For
- Startup founders building an IoT hardware product who need a BLE mobile app to control it
- Embedded engineers who know ESP32 but need help with the mobile app side (Flutter + BLE)
- Flutter developers looking to add Bluetooth Low Energy hardware communication to their skillset
- Hobbyists and makers who want a working BLE car project with clean, reusable code
If you’re looking to hire an ESP32 BLE Flutter developer for a commercial IoT project rather than building it yourself, feel free to book a call - I’ve built production BLE apps for clients ranging from smart home controllers to fitness hardware.
Series Overview
This is Part 1 where we build manual controls - you press forward on your phone, car goes forward. Part 2 will be interesting, I’m working on adding voice control using FunctionGemma for on-device tool calling. So you’d say “go forward” and the car actually moves forward, no cloud API needed, all on-device. But that’s for later.
Components I Used
- ESP32-S3-N16R8 (the one with 16MB flash and 8MB PSRAM)
- Smart Robot Chassis Kit with 2x DC motors
- L298N motor driver
- Power bank (portable charger)
- 4x 1.5 AA batteries
- 2x 100nF ceramic capacitors
- 1x SPDT Slide Switch
- Jumper wires
- Breadboard
- Velcro tape
The Tutorial That Didn’t Quite Work
I initially started with this tutorial from Random Nerd Tutorials: https://randomnerdtutorials.com/esp32-wi-fi-car-robot-arduino/
Great tutorial honestly, and it has way more detail on the hardware setup, wiring diagrams, and how everything connects - so definitely check it out for that stuff. But my ESP32-S3 was different from the ESP32 DOIT DEVKIT V1 they used. The pins didn’t match, the board settings were completely different, and the code needed updates.
I had Claude help me figure out the correct pin mappings for my board and update the motor control code. One thing I had to do was remove the jumper caps on ENA and ENB on the motor driver - those jumpers make the motors run at full speed only. Removing them and connecting to PWM-capable pins on the ESP32 lets you control the speed, which is what we want.
If you’re following a tutorial and things aren’t working, check if your board matches theirs. ESP32 comes in many variants - ESP32, ESP32-S2, ESP32-S3, ESP32-C3 - and they’re not all the same. The S3 especially has different pin layouts and requires different Arduino IDE settings.
Why Flutter for BLE Apps
I went with Flutter and frankly speaking it was the right choice. Here’s why:
Single codebase for iOS and Android - I didn’t want to write the same BLE logic twice. The app works on both platforms with the same code, just had to add some permission strings for iOS.
flutter_blue_plus package - This thing is reliable and well-maintained. I’ve used it in other projects and it just works. The API is clean, scanning for devices is straightforward, connecting and writing to characteristics is simple.
Hot reload - When you’re testing BLE stuff, you’re constantly making small changes. Being able to see changes instantly without rebuilding the entire app saves so much time.
Performance - Some people worry about Flutter performance for hardware stuff. In my experience, for BLE communication it’s more than fast enough. We’re sending single character commands, not streaming video.
Setting Up Arduino IDE for ESP32-S3
This is where the fun begins. And by fun I mean frustration.
Installing Arduino IDE
Download Arduino IDE 2.x from the official site and install it. Easy part done.
Adding ESP32 Board Support
Now here’s where I hit my first wall. You need to add the ESP32 boards to Arduino IDE. The normal way is:
- Go to Arduino IDE → Settings (⌘ + , on Mac, it’s in the Arduino IDE menu, NOT the File menu)
- In “Additional Boards Manager URLs”, paste:
https://raw.githubusercontent.com/espressif/arduino-esp32/gh-pages/package_esp32_index.json- Go to Tools → Board → Boards Manager
- Search “esp32” and install “esp32 by Espressif Systems”
Problem: The download kept timing out for me. The ESP32 package is huge and the servers can be slow.
Solution: Use arduino-cli instead. Open terminal and run:
brew install arduino-cli
arduino-cli core update-index --additional-urls https://raw.githubusercontent.com/espressif/arduino-esp32/gh-pages/package_esp32_index.json
arduino-cli core install esp32:esp32 --additional-urls https://raw.githubusercontent.com/espressif/arduino-esp32/gh-pages/package_esp32_index.json
This worked first try for me. The CLI handles the download better than the GUI for some reason.
Critical Board Settings
This part is important. My ESP32-S3-N16R8 kept crash looping until I figured out the right settings. In Tools menu, set:
- Board: ESP32S3 Dev Module
- Flash Mode: QIO 80MHz
- Flash Size: 16MB (128Mb)
- PSRAM: Disabled
- USB CDC On Boot: Enabled
- Upload Speed: 460800
The PSRAM disabled part was key. I had it set to OPI PSRAM initially (since the board has 8MB PSRAM) and the board kept resetting every 8 seconds. The serial monitor showed RTCWDT_RTC_RST which is a watchdog reset. Disabling PSRAM fixed it. Not ideal since we’re not using the PSRAM, but for BLE control we don’t need it anyway.
The Two USB-C Ports Situation
My ESP32-S3 board has two USB-C ports side by side. This confused me initially.
For programming: Use the USB-UART port (I used the left one when looking at the board with USB ports facing me)
For just powering: Either works
If you plug in and no port shows up in Arduino IDE, try the other port. Also make sure your USB cable supports data, not just charging. I’ve been bitten by charge-only cables before.
Programming the ESP32: The BOOT + RST Method
Even with the right port, uploads would fail with “No serial data received” or get stuck on “Connecting…”. The fix:
- Hold the BOOT button on the ESP32
- Press and release the RST button (while still holding BOOT)
- Release BOOT
- Quickly click Upload in Arduino IDE
The board enters bootloader mode and waits for the upload. You usually only need to do this once, sometimes the board auto-resets into bootloader mode after that.
When upload is successful you’ll see it writing to flash addresses and ending with “Hard resetting via RTS pin…”
ESP32 BLE Car Code
The code has three key parts: motor control, BLE setup, and command parsing. I’ll walk through each one. Full code is on GitHub.
Motor Control
The L298N motor driver takes direction signals (IN1-IN4) and speed signals (ENA, ENB). Setting IN1 HIGH and IN2 LOW spins the motor one way, reverse for the other. analogWrite controls speed via PWM (0-255).
Here’s the forward function - the other directions (moveBackward, turnLeft, turnRight, moveStop) follow the same pattern with different pin combinations:
#define ENA 8
#define IN1 9
#define IN2 10
#define ENB 11
#define IN3 12
#define IN4 13

void moveForward(int speed) {
  digitalWrite(IN1, HIGH);
  digitalWrite(IN2, LOW);
  digitalWrite(IN3, HIGH);
  digitalWrite(IN4, LOW);
  analogWrite(ENA, speed);
  analogWrite(ENB, speed);
}
BLE Setup
This runs once on boot. We create a BLE server, a service with a UUID, and a writable characteristic that receives commands from the Flutter app:
void setup() {
  Serial.begin(115200);

  // Set all motor pins as output
  pinMode(IN1, OUTPUT);
  pinMode(IN2, OUTPUT);
  pinMode(IN3, OUTPUT);
  pinMode(IN4, OUTPUT);
  pinMode(ENA, OUTPUT);
  pinMode(ENB, OUTPUT);
  moveStop();

  BLEDevice::init("ESP32_CAR");
  BLEServer* server = BLEDevice::createServer();
  BLEService* service = server->createService("12345678-1234-1234-1234-1234567890ab");

  commandChar = service->createCharacteristic(
    "abcd1234-5678-90ab-cdef-1234567890ab",
    BLECharacteristic::PROPERTY_WRITE | BLECharacteristic::PROPERTY_WRITE_NR
  );
  commandChar->setCallbacks(new CommandCallbacks());

  service->start();
  BLEDevice::getAdvertising()->addServiceUUID("12345678-1234-1234-1234-1234567890ab");
  BLEDevice::getAdvertising()->start();
}
UUIDs - I just made up some UUIDs. The service UUID is like a category, the characteristic UUID is the specific thing you write to. Your Flutter app needs to use these exact same UUIDs.
PROPERTY_WRITE | PROPERTY_WRITE_NR - This is important. Initially I only had PROPERTY_WRITE and the Flutter app threw an error “write no response property is not supported”. Adding PROPERTY_WRITE_NR (write without response) fixed it. The Flutter package sends commands without waiting for a response by default, which is faster for real-time control.
Command Parsing
When the Flutter app writes to the characteristic, this callback fires. Commands are simple: F for forward, B for backward, L for left, R for right, S for stop. You can optionally add speed like F,200 (max 255):
class CommandCallbacks : public BLECharacteristicCallbacks {
void onWrite(BLECharacteristic* pChar) {
String cmd = pChar->getValue().c_str();
if (cmd.length() == 0) return;
char dir = cmd[0];
int speed = 150; // default speed
if (cmd.length() > 2) {
speed = cmd.substring(2).toInt();
}
switch (dir) {
case 'F': moveForward(speed); break;
case 'B': moveBackward(speed); break;
case 'L': turnLeft(speed); break;
case 'R': turnRight(speed); break;
case 'S': moveStop(); break;
}
}
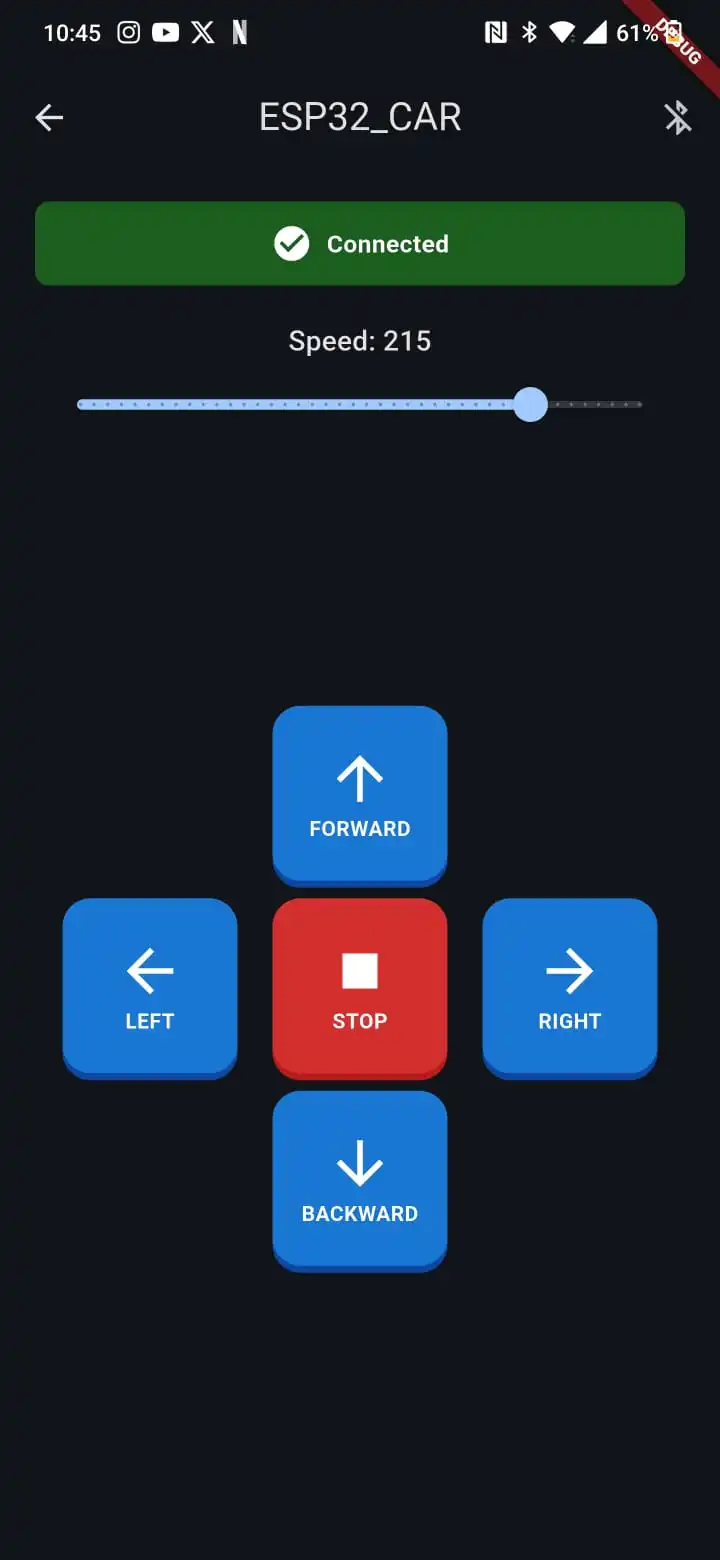
};Flutter BLE Controller App
The app has two screens: scan page and control page. I’ll show the key parts here, full code is on GitHub.
Dependencies
dependencies:
flutter:
sdk: flutter
flutter_blue_plus: ^1.31.0
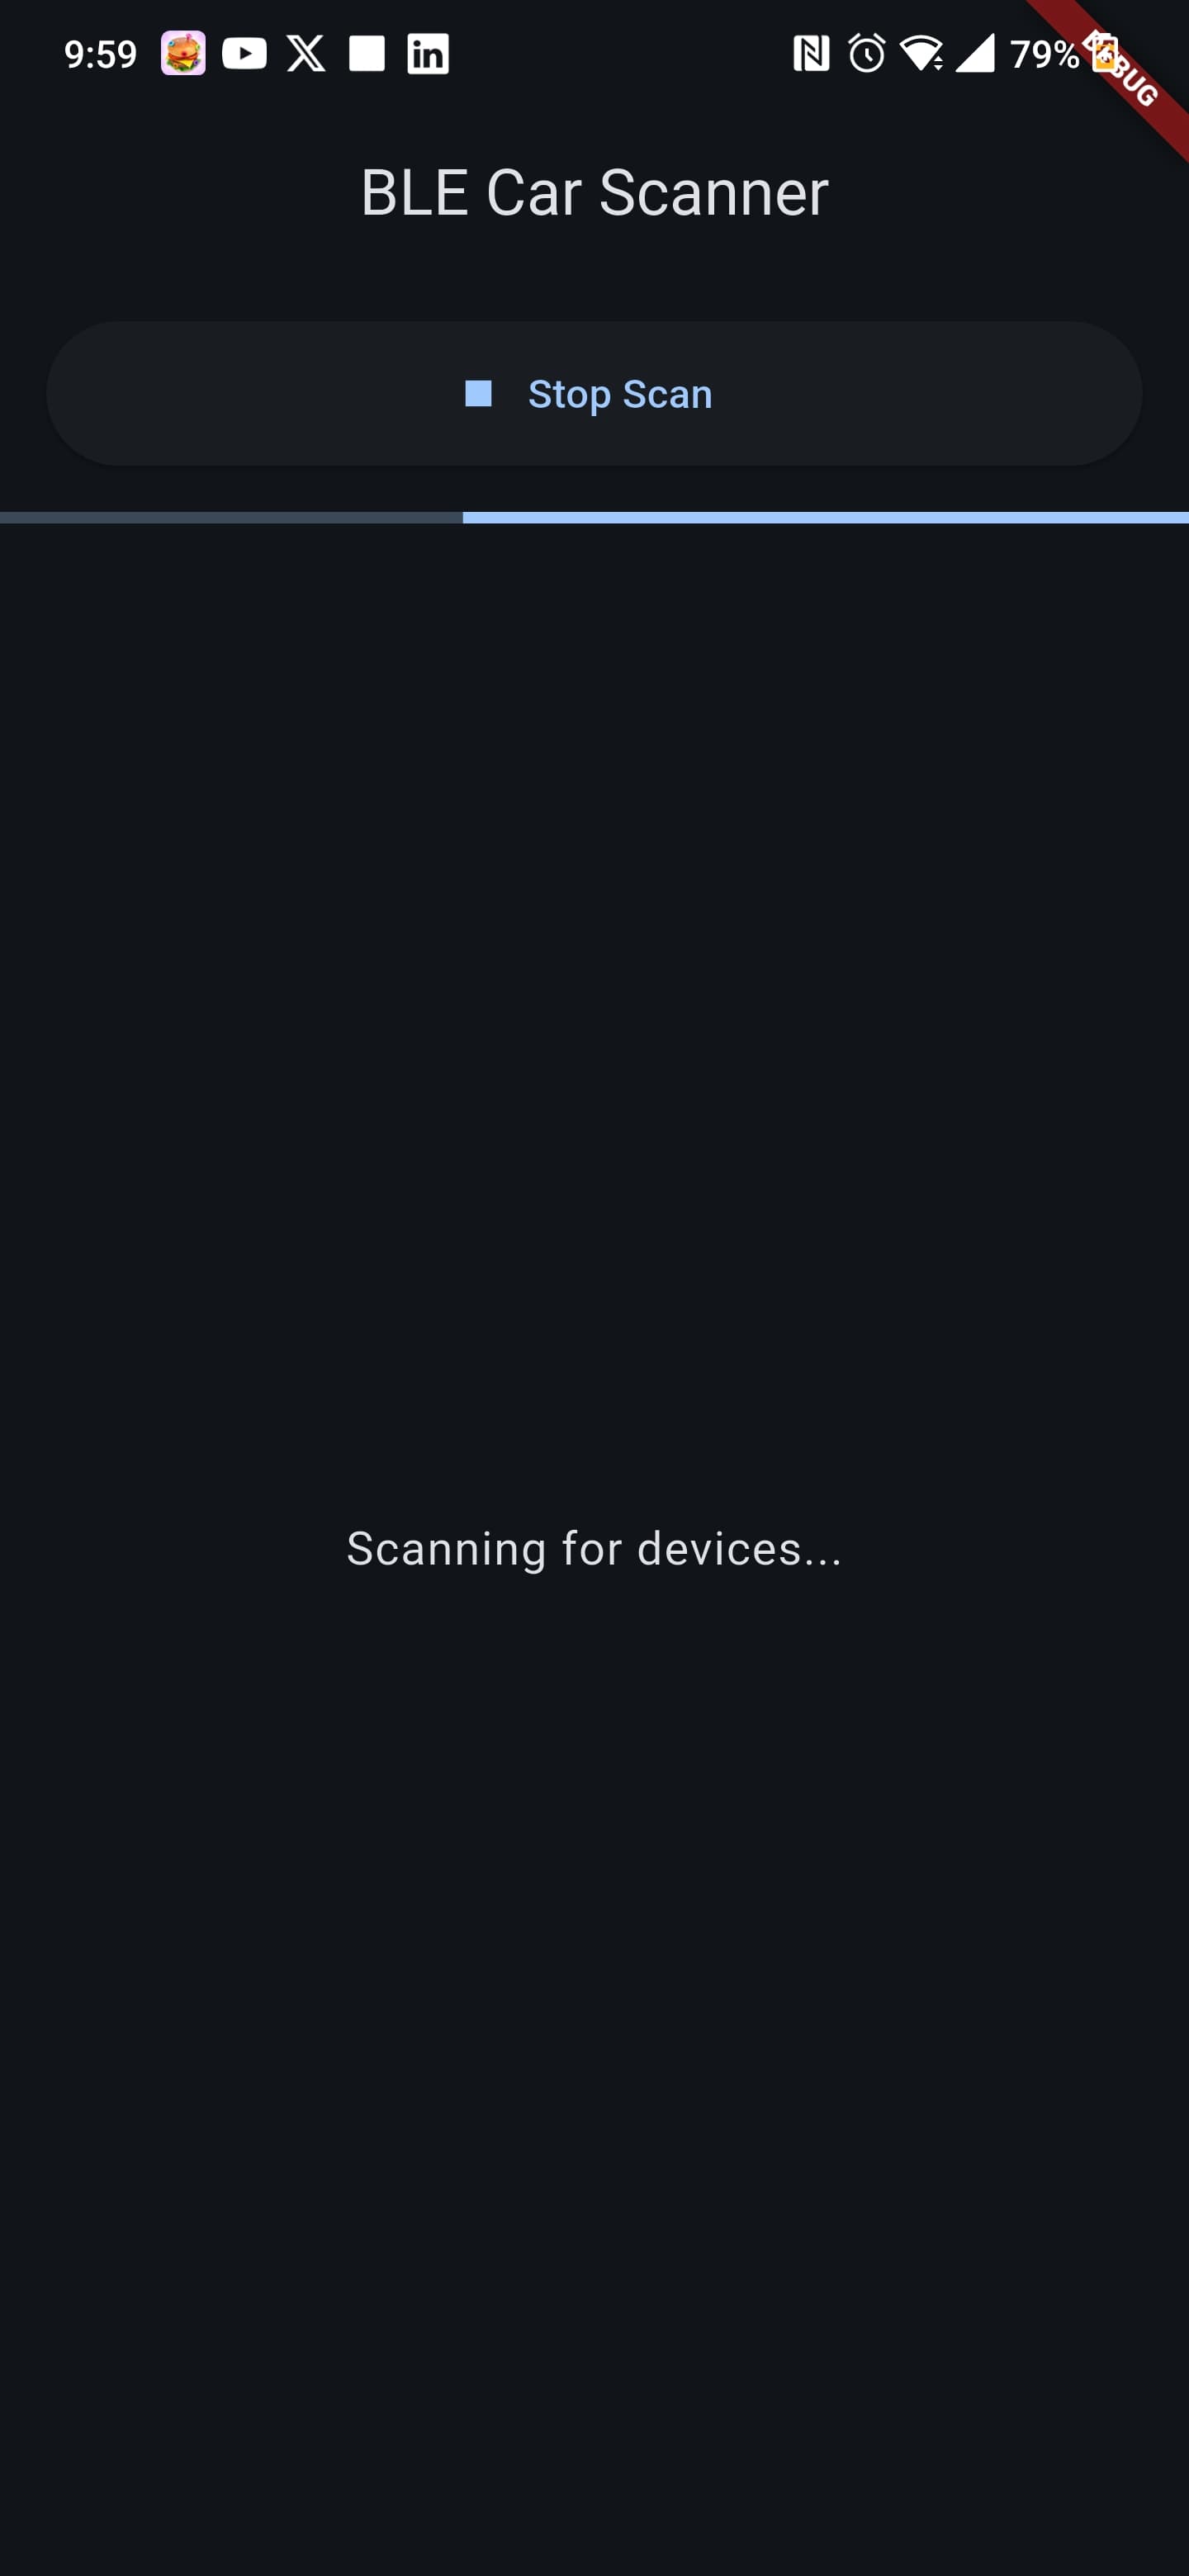
permission_handler: ^11.0.0Scanning for Devices
void startScan() async {
  setState(() {
    scanResults.clear();
    isScanning = true;
  });

  await FlutterBluePlus.startScan(timeout: const Duration(seconds: 10));

  scanSubscription = FlutterBluePlus.scanResults.listen((results) {
    setState(() {
      scanResults = results
          .where((r) => r.device.platformName.isNotEmpty)
          .toList();
    });
  });
}
Nothing fancy here. Start a scan with a timeout, listen to results, filter out devices without names.
Connecting and Discovering Services
Future<void> discoverServices() async {
  List<BluetoothService> services = await widget.device.discoverServices();

  for (var service in services) {
    if (service.uuid.toString().toLowerCase() == serviceUuid.toLowerCase()) {
      for (var char in service.characteristics) {
        if (char.uuid.toString().toLowerCase() == characteristicUuid.toLowerCase()) {
          setState(() {
            commandCharacteristic = char;
          });
          return;
        }
      }
    }
  }
}
After connecting, we discover services and find our specific characteristic using the UUIDs from the ESP32 code.
Sending Commands
Future<void> sendCommand(String command) async {
  if (commandCharacteristic == null) return;

  String fullCommand = command == 'S' ? command : '$command,$speed';
  await commandCharacteristic!.write(
    utf8.encode(fullCommand),
    withoutResponse: true,
  );
}
Commands are sent as UTF-8 encoded strings. The withoutResponse: true is important - matches the PROPERTY_WRITE_NR we added on ESP32 side.
Control Buttons with Auto-Stop
GestureDetector(
  onTapDown: (_) => sendCommand('F'),
  onTapUp: (_) => sendCommand('S'),
  onTapCancel: () => sendCommand('S'),
  child: // button widget
)
When you press the button, it sends forward. When you release, it sends stop. This gives nice intuitive control - hold to move, release to stop.
Full Code
GitHub repo with complete Flutter app and ESP32 code: https://github.com/hamza-imran75/flutter-esp32-ble-car
Troubleshooting: Problems I Encountered
ESP32 Board Package Download Timeout
Problem: Installing ESP32 boards through Arduino IDE Boards Manager kept timing out.
Solution: Use arduino-cli instead. It handles large downloads better.
brew install arduino-cli
arduino-cli core install esp32:esp32 --additional-urls https://raw.githubusercontent.com/espressif/arduino-esp32/gh-pages/package_esp32_index.json
Upload Fails with “No Serial Data Received”
Problem: Arduino IDE gets stuck on “Connecting…” or fails with no serial data error.
Solution: Manual bootloader mode. Hold BOOT, press RST, release BOOT, then click Upload.
Board Keeps Resetting (Crash Loop)
Problem: Serial monitor shows the board constantly restarting with RTCWDT_RTC_RST watchdog reset.
Solution: Wrong board settings. Set Flash Mode to QIO 80MHz and PSRAM to Disabled. This fixed it for my ESP32-S3-N16R8.
BLE Device Not Appearing in Scanner
Problem: Uploaded the code successfully but ESP32_CAR doesn’t show up in nRF Connect or the Flutter app.
Solution: Usually means the code is crashing before BLE starts. Check Serial Monitor for crash loops. Fix with correct board settings above.
Flutter “Write No Response Not Supported” Error
Problem: App connects but sending commands throws a platform exception about write no response not being supported.
Solution: Add PROPERTY_WRITE_NR to the characteristic on ESP32 side:
BLECharacteristic::PROPERTY_WRITE | BLECharacteristic::PROPERTY_WRITE_NROne Motor Slower Than the Other
Problem: Car doesn’t drive straight, one wheel is slower.
Solution: Could be wiring (check connections), motor driver (swap motor connections to test), or just motor variance. You can compensate in code by giving one motor more power than the other.
Common ESP32-S3 BLE Issues Quick Reference
| Issue | Cause | Solution |
|---|---|---|
| Board package download timeout | Large file, slow servers | Use arduino-cli |
| ”No serial data received” | Board not in bootloader mode | BOOT + RST method |
| Constant resets (RTCWDT_RTC_RST) | Wrong flash/PSRAM settings | Flash Mode: QIO 80MHz, PSRAM: Disabled |
| BLE not advertising | Code crashing on startup | Fix board settings, check Serial Monitor |
| ”Write no response not supported” | Missing characteristic property | Add PROPERTY_WRITE_NR |
| No port showing in Arduino IDE | Wrong USB port or bad cable | Try other USB-C port, use data cable |
| Upload stuck on “Connecting…” | Board not entering bootloader | Hold BOOT before and during upload |
What’s Next - Part 2: Voice Control
This manual control works great, but pressing buttons is so 2020. In Part 2 I’m adding voice control using FunctionGemma for on-device tool calling. The idea is:
- You say “go forward”
- FunctionGemma (running on your phone) interprets this as a function call
- App sends the command to ESP32
- Car moves forward
All processing happens on-device, no cloud API needed, no latency from network calls. I’m still working on this part but it’s looking promising.
Conclusion
Built a working BLE-controlled car with ESP32-S3 and Flutter. The hardware setup had more gotchas than expected, especially around the ESP32-S3 board settings. The actual BLE communication part was straightforward once everything was configured correctly.
Key takeaways for ESP32 BLE mobile app development:
- ESP32-S3 board settings (flash mode, PSRAM) matter more than you’d expect - get them wrong and nothing works
- Flutter with flutter_blue_plus gives you a single codebase for iOS and Android BLE apps
- The BLE protocol is simple once configured: write commands to a characteristic, read responses from another
- Always add both
PROPERTY_WRITEandPROPERTY_WRITE_NRfor real-time control apps - Document your troubleshooting - future you (and your users) will thank you
The same architecture in this tutorial applies to a wide range of IoT projects - industrial IoT controllers, smart home devices, fitness hardware, agricultural sensors, or any product that needs a mobile app talking to an ESP32 over Bluetooth Low Energy.
Flutter with flutter_blue_plus made the app development quick. Single codebase, works on both iOS and Android, and the BLE API is clean.
Full code available at: https://github.com/hamza-imran75/flutter-esp32-ble-car
Want to see Flutter in production? Check out Lumbra, a fitness app with video streaming, or Nimbus, an AI-powered study companion — both built with Flutter and Supabase.
If you’re building an IoT product and need a developer who handles both the ESP32 firmware and the Flutter mobile app, let’s talk. Part 2 with voice control coming soon.